
Your Challenge
Working in groups of 2 to 4, do professional interviews of each other using proper audio and lighting. Talk about your projects and what you hope to achieve. Edit the footage down to about 60 to 120 seconds per person. We will watch them in class on Tuesday, allowing us to get a sense for what projects are being worked on, as well as checking on your interview techniques.
A professional interview requires 3 technical elements:
- Artfully implemented lighting
- Clean, crisp, and full audio
- Good camera angles and settings
And here is the classic 3-point lighting for interviews:
Audio:
This is the setup we made in the classroom last year:
And here are the step-by-step instructions for doing it yourself:
- Clear your cards. Interviews take lots of space.
- Charge your camera batteries.
- Charge your light batteries or bring extension cords for corded lights. You don’t want to be restricted by outlets.
- Listen. If there are any sounds or hums, try to muffle them or move as far away from them as possible. Use your audio recorder with headphones to hear these sounds.
- Look for light. Look at what lights might be useful or problematic and take these into consideration when placing your subject.
- Frame it up. Look for symmetries or color balances that might make an interesting background.
- Add depth. Position your subject so that there is lots of room behind them, creating a sense of depth.
- Position Cameras roughly where you want them.
- Select lenses for cameras. Wide angle (e.g. 16mm) gets you close but will distort the face a bit. 30mm (45mm Full-Frame) will look nice and anything higher will look very nice but move you further away.
- You might consider setting to manual focus so your camera doesn’t lose them. Auto focus is pretty good these days though. Play around and see what you are comfortable with.
- Use highest resolution available since you don’t need to slow this down and cameras will be stable.
- You can shoot with a lower shutter speed (1/25 at 24fps) since there will be so little movement, but the 180 degree rule is fine as well.
- Set your key light. Adjust for brightness and color (yellow for warm, white for cool)
- Set your fill light. Get the contrast you want.
- Set your back light to set your subject off from the background.
- Mic your talent and monitor it. Make sure the mic is not scratching as the talent moves. Set levels so they peak around -12 to -6db
- Turn on your camera mounted mic and set levels (just in case the lapel fails)
- Decide what F-Stop you want to use (blurry background or in-focus?)
- Set exposure properly, keeping ISO to a minimum given your desired F-Stop. (Remove any filters if necessary as they can cost you 1 to 3 stops even at lowest settings.)
- Frame up the image as you want it. Consider the rule of thirds, symmetry, and where you will stand (where will they look as they talk)
- Hit record on all cameras and the audio recorder. Run the audio recorder constantly.
- Have a great conversation.
- Import footage and audio into Premiere.
- Lay down your audio track on a4.
- Lay down all of your video tracks on v3/a3 for camera 1, v2/a2 for camera 2, etc. (Put main camera to be used most often on top track)
- Select all clips. Right click ==> Synchronize. Your video should slide to match audio and your camera tracks should line up as well.
- Right click on the main audio track and select Edit in Audition to remove noise, normalize, hard limit, and use any dynamic processing you want. OR you can also use Premiere’s options for this if you don’t need to do any heavy work with the audio.
For more advanced lighting, check this out:
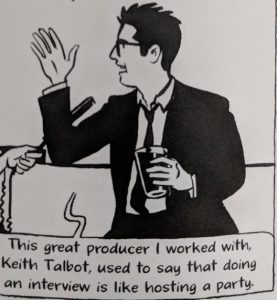
How to Have a great conversation
Your Challenge
Working in groups of 2 to 4, do professional interviews of each other using proper audio and lighting. Talk about your projects and what you hope to achieve. Edit the footage down to about 60 to 120 seconds per person. We will watch them in class on Tuesday, allowing us to get a sense for what projects are being worked on, as well as checking on your interview techniques.


